
Brewery Lab Equipment on a Budget: The Essential QC List
Section 1: Planning Your Equipment Budget
Setting up a commercial craft beer startup means making big choices about your physical equipment.
Founders often debate whether to buy used machinery or invest in custom-built factory systems.
This choice often comes down to comparing used vs new brewery equipment to see which path gets you to profit faster.
Every cellar tank, hot-side vessel, and packaging line you add affects your debt and your cash reserves.
If a startup spends its entire credit line on high-end custom brewhouses, it may run out of working capital before its first batch is packaged.
But choosing cheap, poorly maintained used lines can quickly lead to breakdowns and production delays.
To understand how equipment loses value over time and how to manage these assets, review Wikipedia: Return on Investment.
Whether you run a small taproom or a large packaging floor, your equipment choices decide your profit margins.
A clear financial plan keeps your business protected against sudden maintenance costs and production bottlenecks.
Section 2: Lab and Quality-Control Tools
To keep your beer consistent across thousands of barrels a year, you need a steady quality-control routine in your cellar.
Your lab space should be able to track basic measurements like dissolved oxygen, microbial counts, and gravity readings.
Investing in good brewery lab equipment lets your team catch problems long before the beer reaches distribution.
Before the beer moves toward the fermentation tanks, the lab team should run detailed quality checks.
Samples should be examined with proper lab instruments to confirm healthy yeast and clean fermentation.
Skipping a proper lab setup can lead to spoilage, off-flavors, and recalls that damage your brand.
To learn the basic science behind quality control in food production, review Wikipedia: Quality Control.
A dedicated testing area keeps your beer free of stress flavors, sulfur notes, and unexpected temperature swings.
Building a Five-Area QC Program
A basic brewery quality control program should cover five areas: equipment, wort, fermentation, yeast management, and documentation.
For each area, the brewery should define the measurements to collect, the acceptable limits, the person responsible for testing, and the action required when a result falls outside the target range.
Written standard operating procedures make testing repeatable, even when different brewers or cellar operators perform the work.
Buying laboratory instruments is only the first step. The real value comes from using the same method every time and knowing what to do when a number looks wrong.
A simple QC sheet can connect each test to a clear decision. For example, an unusual pH drop may trigger a contamination check, while a slow gravity change may lead the brewer to examine yeast health or fermentation temperature.
Running a Sensory Program
A sensory program is one of the least expensive quality control tools available to a brewery.
Create a standard tasting sheet for appearance, aroma, flavor, mouthfeel, carbonation, and possible off-flavors. Samples should be evaluated regularly and compared with the brewery’s written specification for each beer.
Whenever possible, use several trained tasters and conduct blind evaluations to reduce personal bias.
A brewer’s palate is still a valuable laboratory instrument, but casual tasting is not enough. The team should taste with a purpose, write down what they notice, and compare the results with previous batches.
Consistent sensory notes can reveal slow changes that may not be obvious during normal production, such as increasing oxidation, weaker hop aroma, or a small rise in diacetyl.
Section 3: How Brewing Technology Has Evolved
The machines inside a modern brewery are the result of centuries of steady improvement.
When a team looks at the history of brewing, they see how simple wooden vessels became modern automated stainless steel systems.
A good temperature-control system lets your team manage the heat that fermentation produces before the yeast is even pitched.
This stable environment gives the brewer control over whether the beer turns out crisp and clean or rich and fruity.
Without that control, the heat from active yeast can push the tank temperature far too high.
A too-warm fermentation creates harsh fusel alcohols, leaving the beer with a solvent-like burn.
To explore the early history of fermentation and food preservation, see Wikipedia: History of Beer.
With good temperature control, every batch can reach its best flavor, saving thousands of dollars in lost product each year.
Section 4: Checking Welds and Sanitary Design
A modern brewery relies on a precise set of mechanical and electrical parts to protect its tanks.
Before the wort ever meets the yeast, it passes through several mechanical steps.
This cold-side setup usually calls for a professional brewery weld inspection to make sure every joint is smooth and sanitary.
The inspector checks the lines for tiny cracks, slag pockets, or rough weld seams.
Any small defect inside a line can trap residue and shield bacteria from normal clean-in-place cycles.
To learn the standards used to check metal joints in food-grade piping, explore Wikipedia: Welding.
The control board also reads signals from submerged temperature sensors, which detect small thermal changes instantly.
The Wort Stability Test
A wort stability test is an inexpensive method for checking sanitation after wort cooling and transfer.
Collect a wort sample before pitching yeast and place it in a sterile, covered container. Keep the sample in a warm, dark location and inspect it regularly for cloudiness, gas production, unusual aromas, or visible growth.
Rapid deterioration may indicate contamination in the heat exchanger, transfer hoses, sampling valve, fermenter, or wort-handling procedure.
This test requires very little equipment, but it can expose a sanitation problem before the main batch develops obvious symptoms.
The test does not identify the exact microorganism, yet it gives the brewery an early warning and a reason to inspect the cold-side process before releasing the beer.
Setting Up a Microbiology Station
A basic microbiology station requires a sensitive laboratory scale, sterile pipettes or loops, prepared growth media, Petri dishes, a small incubator, and a method for sterilizing reusable materials.
Samples can be collected from critical locations such as the heat exchanger outlet, fermenter sample valve, bright tank outlet, filler bowl, and packaged product.
Because microbiological results can be difficult to interpret, employees should receive practical training and follow written procedures for sampling, incubation, colony recognition, and result recording.
Microbiology testing should be added gradually. The brewery can begin with simple hygiene checks and stability tests before moving into routine plating and microorganism identification.
The goal is not to create a research laboratory. It is to identify contamination early enough to protect the next tank, the packaging line, and the beer already waiting for release.
Section 5: Rules, Licensing, and Inspections
Meeting local safety rules and compliance targets means keeping detailed paperwork for every part of your facility.
To make sure your space passes surprise government visits, follow a thorough brewery inspection checklist every day.
Your checklist should confirm proper backflow preventers, safe chemical storage, and automatic temperature cutoff valves.
Failing these safety and sanitation standards can bring fines, forced closures, or long-term legal trouble.
A professional production floor also needs enough spare cooling capacity to crash several tanks at once while keeping cold storage steady.
Undersizing this utility creates serious scheduling bottlenecks, forcing your crew to wait hours for the cold rooms to settle.
To learn how national agencies watch manufacturing sites to protect workers and consumers, see Wikipedia: Food and Drug Administration.
Keeping Central Quality Records
Laboratory results should be stored in a central quality control record rather than on separate paper sheets.
Even a basic spreadsheet can track original gravity, final gravity, pH, fermentation temperature, yeast viability, dissolved oxygen, carbonation, and sensory scores for every batch.
Trend charts and upper and lower limits help the brewery identify gradual changes before they become product failures. Each record should include the batch number, sample point, instrument used, operator, and testing time.
A single unusual result may be a testing error, but a slow change across five or six batches usually tells a story.
Keeping the information together allows the brewer to see whether a problem began in the brewhouse, fermentation tank, bright tank, or packaging line. This makes troubleshooting faster and reduces unnecessary product loss.
Section 6: Importing Equipment and Supply Chains
Running a high-capacity brewery comes with real environmental and energy responsibilities.
Cooling hot wort down to fermentation temperature produces a large stream of hot water inside the heat exchanger.
When outfitting a new floor, founders often import brewery equipment from top international makers to build out their tank farms.
Managing that global supply chain means understanding shipping schedules, tariff codes, and customs clearance.
Smart facilities divert the pre-heated water into storage vessels and reuse it as hot liquor for the next mash or cleaning cycle.
Failing to plan for long shipping times or port delays can stall construction and drive up overhead costs.
To learn how logistics companies handle freight and clear cross-border shipments, review Wikipedia: Customs Brokers.
Packaging Quality Control
Packaging quality control should be included in the brewery lab plan, because a well-brewed beer can still be damaged during filling and sealing.
Useful packaging checks include carbonation measurement, fill-height verification, dissolved oxygen testing, foam stability, can seam inspection, and closure integrity.
Small breweries can begin with manual gauges, regular package sampling, and retained bottles or cans. Automated inspection systems can be added when packaging volume increases.
The laboratory should not stop checking the beer when it leaves the bright tank. Packaging is one of the easiest places for oxygen, carbonation problems, or weak seams to reduce shelf life.
Opening and inspecting a few packages from every run is inexpensive and can reveal problems before an entire pallet reaches customers.
Section 7: Sizing Your Cellar and Its Instruments
Designing a reliable fluid layout means mounting industrial-grade parts onto a rigid support frame.
For a mid-size regional taproom, a standard 7-barrel system — part of the long evolution of brewing technology — offers a good balance of flexibility and weekly volume.
This size lets your cellar team run small specialty batches while keeping the core flagship beers flowing.
Avoid cheap PVC or thin uninsulated lines on glycol loops, because they crack easily and sweat constantly.
Balance valves on each tank branch let operators monitor and adjust the system’s pressure in real time.
Pressure-relief bypass loops should sit right after the main pump to handle closed-valve situations quickly.
To learn the engineering math used when scaling vessel sizes, see Wikipedia: Chemical Engineering.
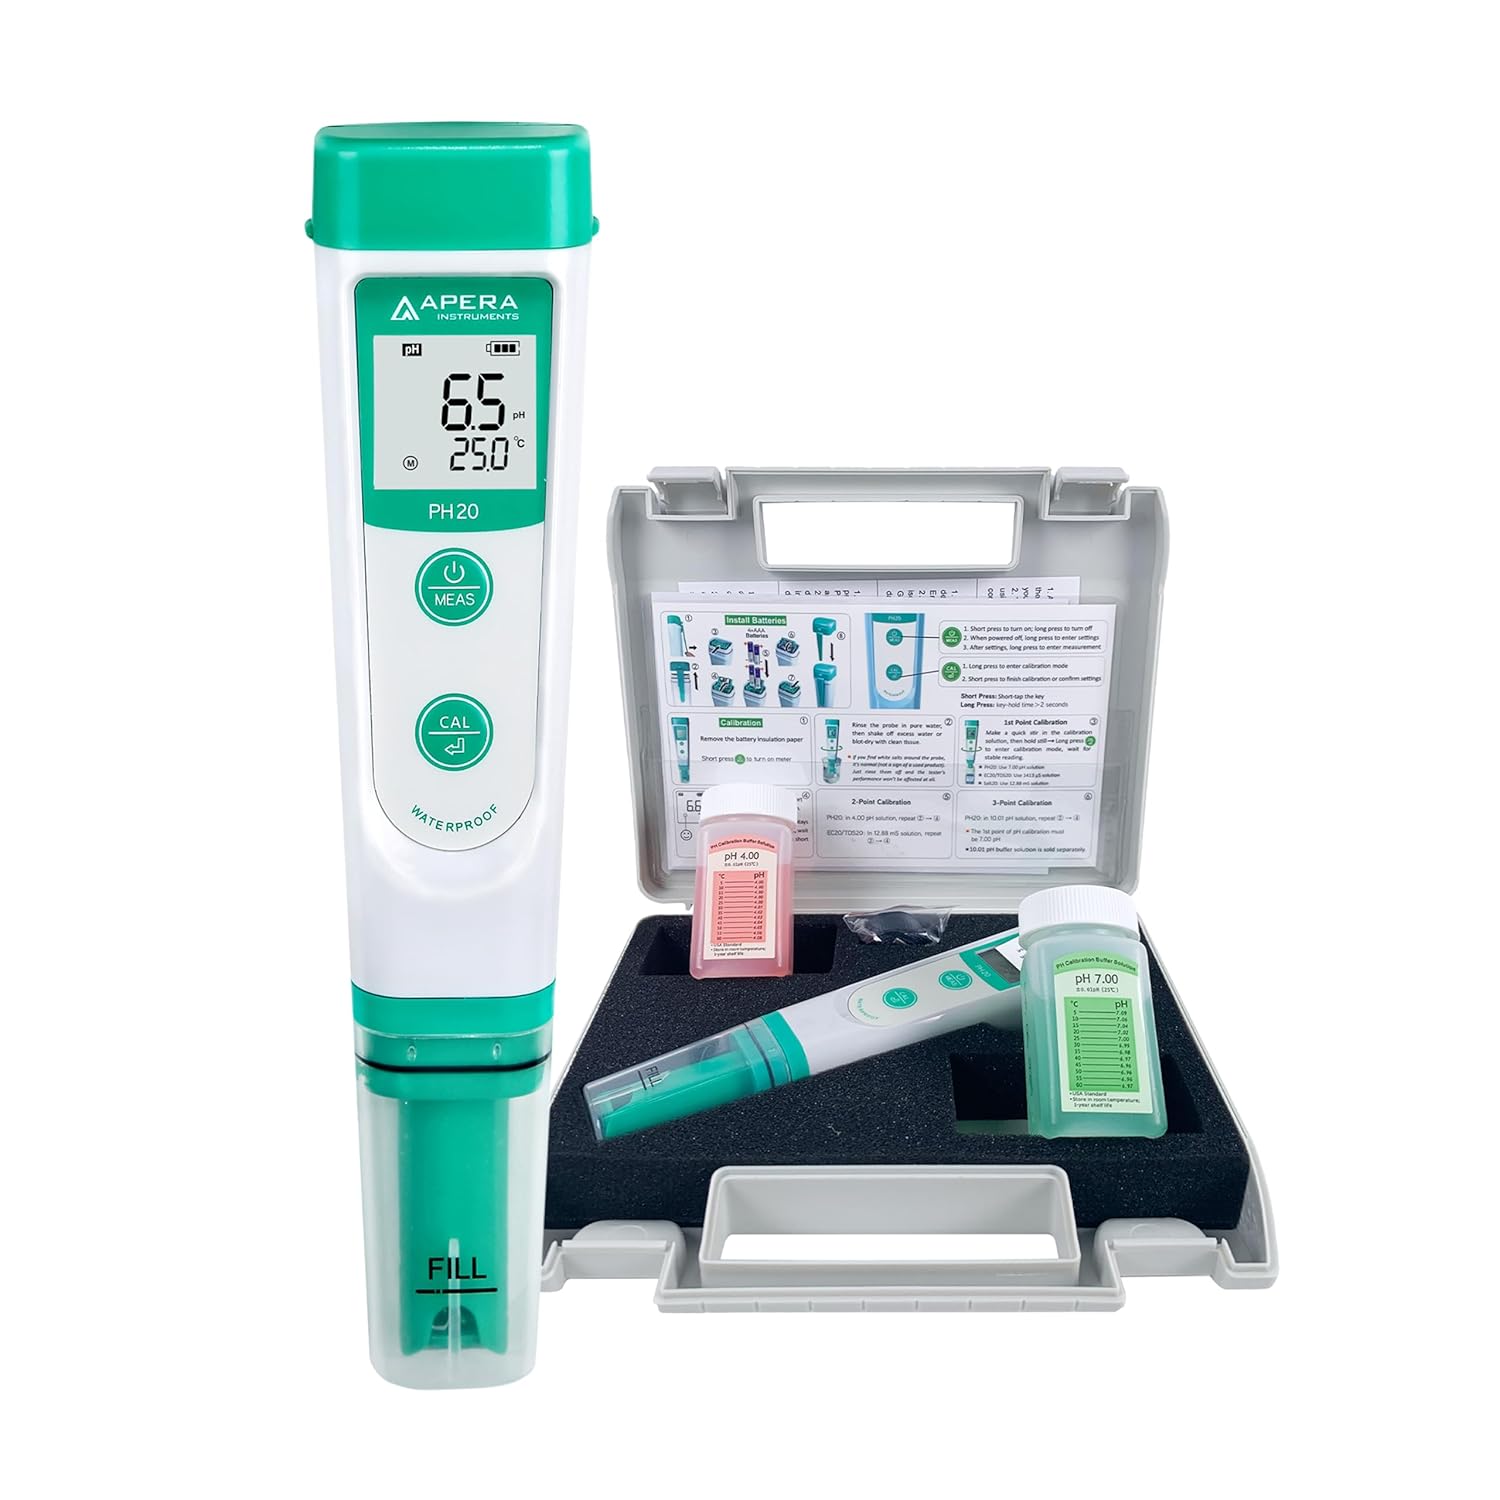
Calibrating and Maintaining the pH Meter
A brewery pH meter should be calibrated before daily testing with fresh buffer solutions that cover the expected sample range.
Beer samples should be degassed before measurement because dissolved carbon dioxide can affect the result. Samples should also be tested at a consistent temperature or with a meter that includes automatic temperature compensation.
The electrode must be rinsed between samples and stored in the correct storage solution rather than distilled water.
A low-cost pH meter can provide excellent information, but only when it is maintained properly. A poorly stored or uncalibrated probe may display a precise-looking number that is completely wrong.
Keeping buffers, storage solution, rinse water, and a short calibration log beside the meter makes correct testing much easier during a busy brew day.
Choosing Gravity Instruments
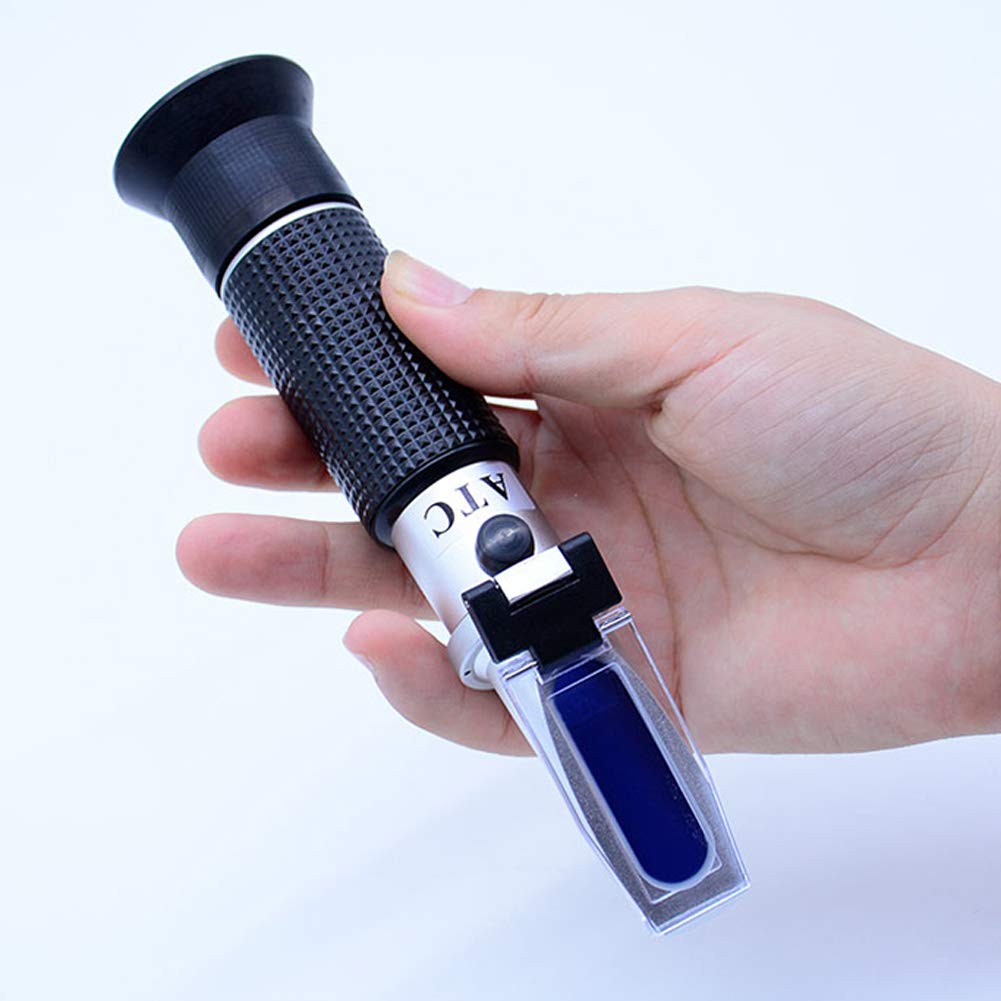
Hydrometers and refractometers provide an affordable way to monitor wort strength and fermentation progress, but each instrument has limitations.
Hydrometers require enough sample volume and readings must be corrected for temperature. Refractometers use only a few drops, but readings taken after fermentation begins must be corrected for the presence of alcohol.
A digital density meter offers faster and more repeatable measurements, although it requires regular cleaning, verification, and a larger initial investment.
The best gravity instrument depends on the brewery’s workload and budget. A carefully maintained hydrometer can still provide reliable results, while a refractometer is useful when the brewer wants to save sample volume.
As production grows, a digital density meter can reduce operator differences and make daily fermentation checks quicker.
Section 8: Budgeting and Financial Forecasting
The final flavor of your beer has a lasting effect on whether customers come back.
When you build your early financial model, working out how much does it cost to start a brewery and choosing the right bbl brewery equipment means tracking several major cost categories.
These costs include real estate, water drainage upgrades, specialized plumbing, and your main machinery.
As fermentation slows, the team should raise the temperature to run a proper diacetyl rest.
This warming step lets the yeast reabsorb compounds that would otherwise leave a slick, buttery aroma in the beer.
By starting with good temperature control, your team can move through these stages smoothly toward clean maturation.
To learn how small businesses handle loans, building costs, and cash flow, check Wikipedia: Startup Company.

Building a Lab on a Budget
A brewery does not need to purchase every laboratory instrument immediately.
Frequently used tools, such as a pH meter, calibrated thermometer, hydrometer or refractometer, microscope, scale, and basic sampling supplies, should normally be kept in-house.
More expensive analyses can initially be completed through an external laboratory, a local brewing guild, a university, or a shared testing service. Equipment can then be added according to production volume and the brewery’s most common quality risks.
The best budget laboratory is not the one with the most equipment. It is the one that performs the most useful tests consistently.
Before buying an expensive analyzer, consider how often it will be used and whether the result will change a production decision. Occasional tests can be outsourced, while the brewery invests first in the tools it needs every day.
The Minimum Viable Lab
A minimum viable brewery laboratory can begin with a pH meter, calibrated thermometers, hydrometer or refractometer, accurate balance, microscope, hemocytometer, yeast stain, sterile sampling containers, ATP swabs, and a small incubator.
The brewery should own the instruments used for frequent production decisions. Expensive equipment, such as a dissolved oxygen meter or spectrophotometer, may initially be shared, rented, or replaced with scheduled external laboratory testing.
A purchasing plan should prioritize instruments according to testing frequency, product risk, and the financial impact of a failed batch.
Start with the tools that answer everyday questions: Is the mash pH correct? Is fermentation moving? Is the yeast healthy? Was the surface cleaned properly?
Once those checks become routine, the brewery can invest in instruments that provide more detailed information about oxygen, bitterness, color, haze, or microbiological contamination.
Section 9: Planning the Project, Step by Step
Every classic beer style developed because of the specific conditions found in its home region.
Carefully outlining the steps to start a brewery keeps your project moving from the first business plan to opening day.
These steps include securing wastewater permits, laying antimicrobial floor coatings, and tuning your glycol chillers.
An authentic Belgian Saison, for example, needs a warm fermentation above 80 degrees Fahrenheit to bring out spicy phenolics.
With a multi-zone control panel, your team can run a warm ale on one tank and a cold lager on another at the same time.
This flexibility lets a single plant make a wide range of quality beers without losing consistency.
To review the project-management tools used to guide complex builds to completion, look at Wikipedia: Project Management.
Section 10: Choosing the Right Business Model
Choosing how to source your main refrigeration equipment means balancing your startup budget against long-term maintenance.
Founders must weigh the pros and cons of launching a microbrewery or brewpub model to match their local market.
A microbrewery focuses on high-volume packaging and wholesale distribution to earn revenue through regional retail shelves.
A brewpub relies on high-margin on-site taproom sales, pairing house-brewed drinks with full kitchen food service.
New custom systems come with full warranties, direct support, and modern wiring that meets local codes.
A common strategy is buying a new core chiller skid while sourcing used piping and storage tanks.
Whatever path you choose, checking the electrical safety and reliability of every compressor prevents costly losses later.
Section 11: Equipment Cost Comparison Table
Choosing your equipment means balancing upfront cost against long-term operating efficiency.
The table below compares the typical cost and operating life of different equipment options:
| Equipment Strategy Option | Typical Initial Cost Allocation | Mechanical Life Expectancy | Warranty & Service Levels |
| Used Broker Equipment | 40% to 60% of New Retail | 3 to 7 Operational Years | As-Is / No Manufacturer Support |
| Direct European Import | 85% to 110% of New Retail | 15 to 25 Operational Years | Limited Overseas Parts Warranties |
| Domestic Custom Built | 100% to 130% of New Retail | 20 to 30 Operational Years | Full Comprehensive Local Support |
| Turnkey Automated Skids | 120% to 150% of New Retail | 20+ Highly Efficient Years | 24/7 Remote Monitoring Support |
Section 12: Steel Quality and CIP Cleaning
The way your cleaning agents react with your steel tanks affects how long your equipment lasts.
Cellar tanks must be built from high-grade stainless steel, usually AISI 304 or the more acid-resistant AISI 316L.
These alloys contain plenty of chromium and nickel, which form a protective oxide layer over the metal.
This layer protects your tanks from cleaning acids, hot sanitizing solutions, and strong internal forces.
To stop bacteria from taking hold, the inside steel must be polished to a smooth, low-roughness finish.
Any rough spots, weld lines, or scratches can trap residue and hide bacteria from normal cleaning cycles.
To keep the high sanitary standards a production floor needs, maintenance must follow strict cleaning loops.
Section 13: Safety and Refrigerant Systems
Running an industrial cellar means handling high pressures and special chemicals under strict local laws.
The high-pressure lines and refrigerants inside your condenser units cannot be allowed to leak into the workspace.
To follow local safety laws, modern facilities install a dedicated refrigerant leak-detection system.
This setup samples the air near your compressors and triggers alarms automatically if levels spike.
Your floor crew also needs full protective gear, including electrical safety equipment, heavy gloves, and face protection during servicing.
By making safety and the environment a priority, you protect your staff and keep the facility running without legal delays.
Section 14: Summary and Growth Plan
Choosing your core setup starts with a clear view of your sales goals, your space, and your budget.
If you run a taproom model where beer sells quickly on-site, a compact automated chiller skid is an affordable path.
But if your goal is wholesale distribution across several states, a fully integrated multi-compressor system is essential.
Be sure to check your building’s floor-weight limits, balance your glycol concentrations, and enforce strict testing routines.
By matching your equipment to your volume goals and treating your cooling system as a key partner, your team can keep delivering great beer.
Contact Us
Author | Operations & Sourcing Lead
Luca is an operations and sourcing specialist with extensive experience in project management and industrial manufacturing. This blog serves as a technical resource for brewery owners, offering clear guidance on equipment design, quality control, and supplier evaluation. In parallel, Luca advises international buyers on sourcing and importing brewing equipment—helping them manage risk, avoid costly mistakes, and achieve consistent production quality.