
Read Time: ⏱️ 10 minutes | By: Luca
Section 1: The Commercial Threshold for Independent Brands
For entrepreneurs entering the commercial beverage world, choosing the first cold-side capacity is a critical financial decision.
If your tank capacity is too small, your staff will constantly run out of core flagship beers, raising labor and limiting revenue.
But if you buy massive industrial gear too soon, your inventory sits idle, tying up capital and risking freshness.
A commercial 7 bbl fermenter is the classic entry-level sweet spot for small-scale startup breweries.
A single 7-barrel tank holds exactly 217 US gallons, or about 822 liters, of active fermenting product.
This size lets a team supply wholesale accounts and keep pace with busy taproom lines.
Finding the Best fermenter types for your new venue means matching your layout limits with the right pressure ratings and jacket controls.
This guide covers the building footprints, mechanical setups, and cleaning loops needed to add a 7 BBL tank to your startup cellar.
Section 2: Conical Yeast Separation vs. Open-Top Maceration
Choosing your primary cellar vessel means looking at how your beer styles work with different tank base shapes.
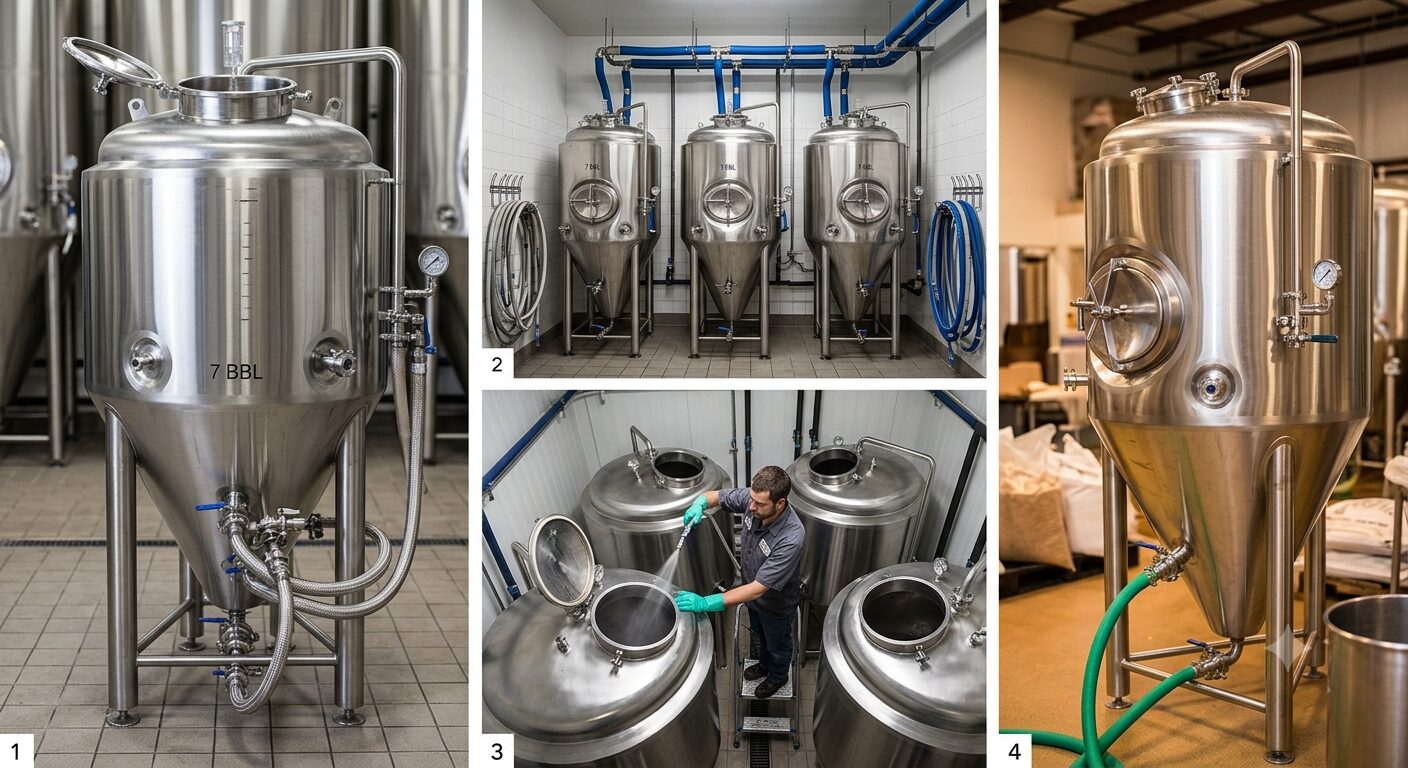
The industry standard for a modern commercial fermentation tank is the vertical cylinder shell with a steep 60-degree cone base.
This sharp 60-degree angle uses gravity to pull trub and flocculating yeast into a dense plug at the bottom point.
By separating these solids from the main liquid, brewers can harvest healthy cultures or purge waste without moving the beer.
But many basic standalone conical fermenters are low-pressure systems, usually limited to pressures under 5 PSI.
Because they cannot handle high gas pressure, you cannot use them to force-carbonate finished beer with carbonation stones.
This limit means moving the beer to a separate bright tank, which shows the clear trade-offs of a split brite tank vs fermenter footprint.
By contrast, open-top fermenters leave the liquid open to cleanroom air, removing all head pressure to boost ester production in traditional ales.
Section 3: The Multi-Functional High-Pressure Unitank Setup
To save floor space and cut the product losses from transfers, modern taprooms use multi-functional unitanks.
A unitank matches the vertical, cone-bottom shape of standard Conical fermenters but uses thicker stainless steel plates and reinforced bands.
These upgrades let the vessel safely handle continuous working pressures from 15 to 30 PSI.
Working under high pressure completely changes how a cellar team manages packaging timelines.
Brewers can close the gas arm near the end of the cycle to trap natural carbon dioxide inside the liquid column.
This natural pressure carbonates the beer while keeping the vulnerable liquid safely away from atmospheric oxygen.
A unitank also has permanent sanitary ports for high-pressure carbonation stones, rotating racking arms, and sample valves.
This lets you ferment, drop yeast, cold-crash, and fully carbonate inside a single sealed vessel with no extra transfers.
Specialized Brew-in-Fermenter Systems
Some specialized systems allow mashing, boiling, chilling, fermentation, and carbonation to take place inside the same main vessel.
This approach can reduce transfers, piping, floor space, and the number of separate tanks required by a small brewery.
However, the fermenter remains occupied during every production stage.
The brewery cannot prepare another batch in the same vessel while the previous beer is still fermenting or conditioning.
These systems also require dedicated heating hardware, removable internal components, and cleaning procedures that differ from those used with a standard conical fermenter.
The brewery should compare production flexibility, cleaning time, utility requirements, and equipment downtime before choosing this configuration.
A traditional unitank combines fermentation, conditioning, and carbonation.
Some specialized systems go further and allow the wort to be brewed inside the same vessel.
This can create a very compact brewery with fewer transfers.
The trade-off is that the tank remains unavailable throughout the complete brewing and fermentation cycle.
It can be a clever solution for a small venue, but it should be compared carefully with a separate brewhouse and fermenter layout.
Dry-Hop Port Size and Operator Access
A dedicated dry-hop port makes it easier to add hops, fruit, spices, or other ingredients without opening the main manway.
A four-inch tri-clamp port provides more space than a standard process fitting and reduces the chance of compacted hop material blocking the opening.
The port should be positioned where operators can reach it safely using a fixed platform, approved stairs, or another suitable access system.
For pressurized dry hopping, the brewery should use a controlled procedure that includes tank depressurization or a closed dosing device, carbon dioxide purging, correct valve sequencing, and suitable personal protective equipment.
Adding hops to a 7 BBL tank is very different from adding them to a small pilot fermenter.
A larger dedicated port makes the operation faster and reduces the chance of hop material becoming stuck.
It also allows the brewery to use a closed dosing system when oxygen control is important.
The access point must be safe.
Cellar workers should not carry heavy hop containers up an unsecured ladder or open a fitting on a pressurized vessel.
Section 4: Sizing Milestones and Growth Paths for Craft Producers
Every growing craft company scales its primary and secondary tanks to its brewhouse batch sizes and target sales.
For labs, small startups, or recipe teams, a compact 1 bbl fermenter is the standard choice for pilot testing.
These small pilot tanks let you check yeast performance and try new ingredients without risking a lot of raw material.
As a venue finds its footing, moving up to a 5 bbl fermenter gives a solid base for on-site retail draft sales.
When a brand builds a steady local following, a 7 bbl fermenter gives the extra volume to support packaging lines, like mobile canning runs.
When local demand keeps climbing, upgrading to a 10 bbl fermenter, a 15 bbl fermenter, or a heavy-duty 30 bbl fermenter improves labor efficiency.
Finally, a massive 90 bbl fermenter gives the volume to keep automated high-speed canning and bottling lines running constantly.
Double Batching from a Smaller Brewhouse
A 7 BBL fermenter can also support breweries operating a smaller 3 or 3.5 BBL brewhouse.
Two consecutive brews can be transferred into the same vessel, allowing the brewery to produce a larger batch without immediately replacing the hot-side equipment.
The second batch should normally enter the fermenter within a controlled time window.
Wort temperature, oxygenation, yeast pitching, cooling, and sanitation must remain consistent between the two brews.
The cooling jackets and temperature probe must also work correctly while the tank contains only the first partial batch.
A brewery does not necessarily need a 7 BBL brewhouse to use a 7 BBL fermenter.
Two smaller brews can be collected inside the same tank, making it possible to increase the volume of popular beers without replacing the entire brewing system.
The process needs careful coordination.
The first batch must remain at the correct temperature while the second one is being prepared, and both brews should receive consistent oxygenation and yeast management.
Stackable 7 BBL Fermenters
Stackable fermenters can increase cellar capacity without using additional floor space.
This configuration may be useful in urban breweries, basement cellars, and compact taprooms where the available footprint is limited but the ceiling height is sufficient.
The supporting frame, floor anchors, legs, and concrete base must be engineered for the combined weight of the filled vessels.
Safe access to valves, dry-hop ports, CIP devices, pressure-relief systems, and glycol connections also requires fixed stairs, platforms, guardrails, or another approved access system.
Stacking should never be attempted unless the tanks and supporting structure were specifically designed for this purpose.
Stacking two fermenters can almost double the production capacity of the same floor area.
The idea is attractive for a small brewery, but it changes the entire installation.
The floor must support the concentrated load, and the team needs safe access to the upper tank.
A standard fermenter should never simply be placed above another one.
The vessels, frame, anchoring, and access platform must be designed together as one engineered system.
Section 5: Thermal Insulation Engineering and Glycol Jacket Controls
A commercial 7 BBL tank needs a strong utility setup because even mid-size volumes make a lot of heat during active fermentation.
The tank should have multi-zone laser-welded dimple jackets connected to an automated propylene glycol chiller.
Dimple jackets are efficient because they force the chilled coolant into a turbulent flow across the steel surface.
This turbulence breaks up the still boundary layer, giving fast heat transfer and preventing hot spots inside the tank.
To keep room heat from affecting your fermentations, the tank body should be wrapped in high-density polyurethane insulation.
All ports, sample valves, and pressure devices should use sanitary tri-clamp fittings to remove threaded pockets where bacteria can hide.
The inside steel should be polished to a mirror finish with a Roughness Average (Ra) of 0.8 micrometers or less.
This smooth finish makes automated cleaning work well and stops wild yeast from forming biofilms inside the tank.
Standard, Tall, and Short Tank Configurations
A 7 BBL fermenter can be manufactured with different height-to-diameter ratios while maintaining a similar working capacity.
A tall and narrow vessel uses less floor space but requires more ceiling clearance and can create a deeper liquid column.
A short and wide tank fits more easily beneath low ceilings but occupies a larger cellar footprint.
Changing the tank proportions may also affect cooling-jacket placement, thermowell height, shipping dimensions, leg design, hydrostatic pressure, and access to the top fittings.
The brewery should compare several dimensional drawings before approving the final configuration.
The standard version of a 7 BBL fermenter may not be the best shape for every building.
A taller tank can save valuable floor space, while a shorter model may be easier to install beneath pipes, beams, or a low ceiling.
The volume can remain the same, but the way the tank cools, ships, and fits into the cellar may change.
Always compare the actual drawings rather than choosing only by barrel capacity.
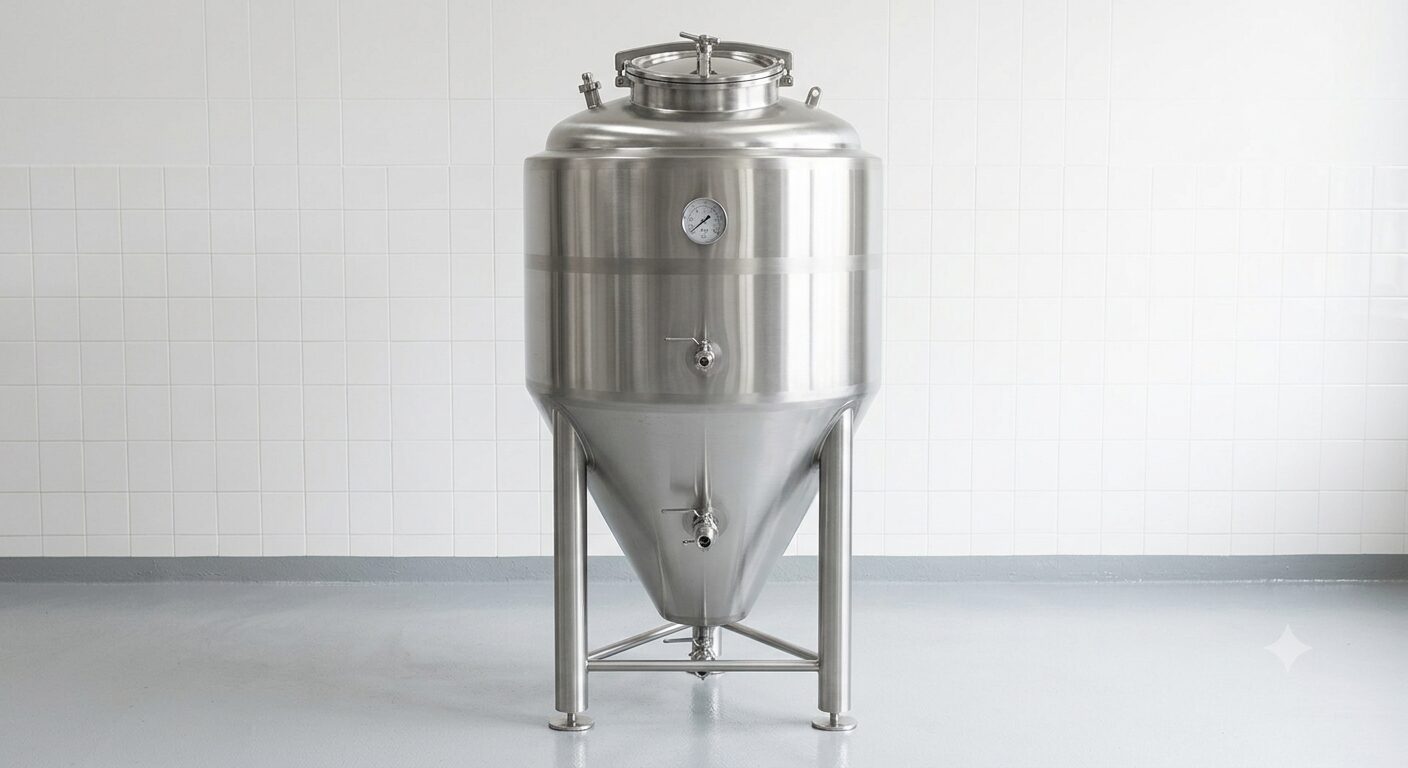
A fermentation tank made from 304 stainless steel is strong, hygienic, and suitable for professional brewery use.
The dimpled cooling jackets help control temperature during fermentation, keeping the beer stable and consistent.
A butterfly valve makes liquid transfer and cleaning easier, while the relief valve helps release excess pressure when needed.
If the vessel is rated up to 15 psi, the brewer can manage pressure more safely during specific fermentation or carbonation steps.
Section 6: Cross-Industry Vessel Applications and Technical Versatility
The core rules of temperature control, sanitation, and fluid transfer apply across all professional beverage sectors.
In the wine industry, a dedicated commercial WINE FERMENTER uses wide shapes to manage the floating cap of grape skins during red-wine maceration.
But white winemakers, cider producers, and mead makers often use vertical conical tanks that look exactly like standard beer gear.
This overlap lets microbreweries diversify their product lines by making small, niche drinks.
Setting up a flexible beer brewing fermenter for multi-beverage work means using very adjustable temperature control.
To study how different yeast strains react to changing tank shapes, teams read the technical manuals from the Siebel Institute of Technology.
Mastering these fermentation dynamics helps your team keep quality high across every style.
Section 7: Secondary Fermentation and Extended Cellar Maturation
Managing your yeast across several generations is key to keeping raw-material costs low and fermentations consistent.
In a two-stage process, brewers move the green beer off the primary yeast cake into a dedicated secondary fermenter.
This secondary tank is great for long aging, wood-chip additions, or adding fruit and spices.
Moving the beer to a clean secondary tank keeps it off dead yeast for too long, which prevents rubbery autolysis off-flavors.
But a high-pressure unitank removes the need for a secondary transfer, letting you dump yeast straight out of the bottom cone.
By opening the lower valve, the team can purge trub and harvest healthy yeast without exposing the beer to air.
To study the biology behind yeast health and harvesting, managers read the journals from the American Society for Enology and Viticulture (ASEV).
Section 8: Metallurgical Standards and Bio-Security Compliance
The exact alloy and inside finish of your tanks directly affect your shelf-life and daily cleaning costs.
Commercial tanks must be built from premium austenitic stainless steel, usually AISI 304 or acid-resistant AISI 316L.
These alloys have high levels of chromium and nickel, which form a self-healing, passive oxide layer on the surface.
This passive layer protects the tank from cleaning acids, high-chloride water, and the natural acidity of fruit and hops.
Any rough spots, weld lines, or scratches can shelter wild yeast and shield it from even a custom microbrewery fermenter cleaning run.
To set your wash temperatures and protect your staff, the Master Brewers Association of the Americas (MBAA) provides full safety guides for cellar work.

Section 9: 7 BBL Vessel Procurement Specification Matrix
Choosing your core production tanks means balancing your upfront budget against the daily labor hours your crew spends.
The comparison matrix below highlights the key engineering parameters across standard equipment choices:
| Mechanical Design Element | Low-Pressure Conical Setup | High-Pressure 7 BBL Unitank |
| Maximum Pressure Tolerance | Limited below 5 PSI threshold | Rated for 15 to 30 PSI continuously |
| Yeast Purging Mechanism | Standard 60° bottom dump valve | Bottom dump valve with pressurized links |
| Force Carbonation Stone | Incompatible (Requires bright tank split) | Fully Compatible via sanitary tri-clamp ports |
| Oxidation Risk Profile | Higher if moved to separate bright tanks | Zero (Sealed all-in-one cellaring cycle) |
Working Volume vs. Maximum Tank Capacity
A fermenter advertised as 7 BBL should provide seven barrels of usable working volume, with additional internal capacity reserved for krausen and carbon dioxide.
Some manufacturers use the working volume in the product name, while others advertise the total internal volume.
This difference can affect the amount of wort that can be transferred safely from the brewhouse.
For example, a tank may provide a 7 BBL working volume while holding approximately 9 BBL when completely full.
Before purchasing, ask for the certified working volume, maximum volume, recommended headspace, and calibrated volume chart.
Not every tank labeled “7 BBL” offers the same amount of usable fermentation space.
One supplier may provide a full seven-barrel working volume plus extra room for foam.
Another may include that empty space inside the advertised capacity.
Always compare the real working volume rather than relying only on the product name.
This prevents the brewery from buying a tank that cannot safely receive the complete brewhouse batch.
Section 10: Clean-In-Place (CIP) Efficiency and Sterile Loops
Perfect sanitation across your cellar is the single most important factor for protecting your brand and your shelf-life.
To clean these large tanks safely without hand scrubbing, plants use automated Clean-In-Place (CIP) loops.
The CIP setup uses a high-flow spray ball in the top dome to push cleaning fluid across every internal surface.
A standard CIP run starts with a fresh-water pre-rinse to knock off heavy yeast cakes and loose matter.
Next, a heated caustic (sodium hydroxide) solution is pumped through the loop at 60°C to 80°C to break down oils and proteins.
After a quick rinse, an acid wash of phosphoric and nitric acid dissolves hard minerals, like calcium oxalate scale.
To track how well the cleaning works, quality teams use automated ATP bioluminescence swabs to confirm sterility.
For advice on removing stubborn scale without scratching your polished steel, producers follow the manuals from the Brewers Association.
Section 11: Real-Time Density Probes and Automated Fermentation Tracking
The beverage market is adopting digital systems, turning traditional cellars into connected, data-driven networks.
Traditionally, a cellar worker had to draw a sample from every active tank each day to check the sugar drop with a glass hydrometer.
This manual work takes labor hours, wastes product, and adds a small contamination risk every time the valve is opened.
To solve this, modern plants fit digital inline density sensors right into the walls of their tanks.
These smart sensors use continuous pressure data or sound frequencies to track the sugar drop in real time, sending alerts to the brewer’s phone.
If a batch slows down unexpectedly, the software warns the team early, so they can adjust the temperature before the fermentation stalls.
To balance this automation with classic flavor, teams consult the Australian Wine Research Institute (AWRI) to study how processing changes affect long-term aging.
Liquid-Level Sight Glass
A liquid-level sight glass allows the cellar team to monitor the amount of beer inside the fermenter without opening the vessel.
It can help operators follow transfers, estimate remaining volume, prevent overfilling, and identify unexpected product losses.
The sight glass should use sanitary fittings and be positioned where it can be read safely during daily operations.
Because it creates an additional product-contact surface, the tube, valves, gaskets, and connections must be included in the CIP and inspection program.
A sight glass provides a quick visual check of how much beer is inside the tank.
This can be useful during filling, transfers, carbonation, and packaging because the brewer does not need to estimate the remaining volume from flow rates alone.
The sight glass must still be treated like every other sanitary component.
If it is difficult to drain or clean, it can become a contamination risk instead of a useful tool.
Sensor Calibration Before Commissioning
Temperature probes, pressure gauges, digital density sensors, and automated controllers should be calibrated before the fermenter enters production.
A temperature probe can be compared with a certified reference thermometer at several operating temperatures.
Pressure gauges should return to zero correctly and be tested against a known standard.
Density sensors must also be checked with reference liquids or verified laboratory measurements.
Calibration results, acceptable tolerances, adjustment dates, and the next scheduled inspection should be recorded.
An automated system cannot improve fermentation control when its sensors are supplying inaccurate data.
Digital control is only useful when the instruments are telling the truth.
Before the first production batch, compare the temperature probe, pressure gauge, and density sensor with reliable reference measurements.
Repeat these checks regularly because sensors can slowly drift over time.
A small temperature error may appear harmless, but it can affect yeast performance and batch consistency across the entire cellar.
Section 12: Final Summary and Startup Operational Blueprint
Deciding on your primary 7 bbl fermenter setup needs a clear, long-term view of your beer styles, packaging, and floor space.
If your business moves inventory fast through direct-to-consumer taproom lines, standalone low-pressure conicals are an affordable baseline.
But if your goal is a fast wholesale packaging line focused on labor savings and full oxygen protection, high-pressure unitanks are the premier choice.
Be sure to check your building’s floor weight limits, plan for plenty of headspace, and enforce strict automated CIP loops.
Adjustable Legs and Load Distribution
A 7 BBL fermenter must stand level to drain correctly and distribute its weight evenly across the supporting legs.
Adjustable feet compensate for small variations in the concrete floor.
Oversized footplates spread the load over a larger surface and provide more space for secure anchoring.
The tank should be checked for vertical alignment before connecting the glycol pipes, product lines, and CIP system.
Leveling should be verified again after the first full batch because the supporting surface and mechanical connections may settle under operating weight.
Incorrect alignment can leave beer or cleaning solution inside the cone and place uneven stress on the tank legs.
A large fermenter should not simply be placed on the floor and connected.
Even a small difference between the legs can affect drainage and place more weight on one side of the structure.
Adjustable feet help the installer position the tank correctly, while larger footplates distribute the load more safely.
Check the alignment when the tank is empty and again after it has been filled for the first time.
Freight, Receiving, and Installation Planning
A 7 BBL fermenter may be too tall for standard pallet freight and can require a dedicated truck.
Before shipping, verify loading access, exterior and interior door dimensions, ceiling obstructions, corridor width, turning radius, and the capacity of the available forklift or crane.
The brewery should know the vessel’s shipping weight, overall height with the top fittings installed, center of gravity, and approved lifting points.
Freight, unloading, insurance, rigging, and installation costs should be included in the project budget.
The receiving area and installation crew must be prepared before the truck arrives to avoid delays and additional transport charges.
A 7 BBL fermenter does not always arrive like an ordinary equipment package.
Its height may require a dedicated truck, and the brewery may need a forklift, crane, or professional rigging company to move it into position.
Measure the complete delivery route before the tank leaves the supplier.
Discovering that it cannot pass through a door or turn inside a corridor on delivery day is an expensive problem.
By choosing the right equipment for your volume goals and treating your cellar assets as vital partners, your team can deliver great products to your market for years.
Contact Us